前回は OpenLiteSpeed でウェブサーバーを構築しましたが、今回はその続きとしてデータベースサーバーを構築していきます。


MariaDB のインストール
今回は、サポート期限の長い MariaDB 10.11(LTS)を選択しました。

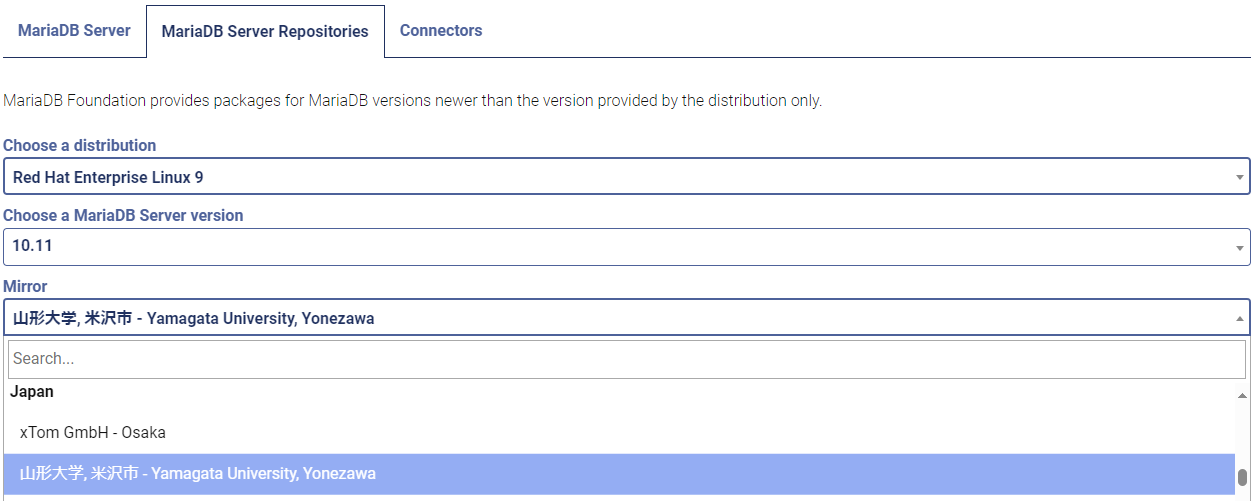
リポジトリの追加
MariaDB 公式から適切なリポジトリを取得し、追加します。
今回は山形大学のリポジトリーを使わせて貰うことにします。
# MariaDB 10.11 RedHatEnterpriseLinux repository list - created 2023-11-09 00:24 UTC
# https://mariadb.org/download/
[mariadb]
name = MariaDB
# rpm.mariadb.org is a dynamic mirror if your preferred mirror goes offline. See https://mariadb.org/mirrorbits/ for details.
# baseurl = https://rpm.mariadb.org/10.11/rhel/$releasever/$basearch
baseurl = https://ftp.yz.yamagata-u.ac.jp/pub/dbms/mariadb/yum/10.11/rhel/$releasever/$basearch
# gpgkey = https://rpm.mariadb.org/RPM-GPG-KEY-MariaDB
gpgkey = https://ftp.yz.yamagata-u.ac.jp/pub/dbms/mariadb/yum/RPM-GPG-KEY-MariaDB
gpgcheck = 1
MariaDB のインストール
追加したリポジトリから MariaDB をインストールしていきます。
dnf install MariaDB-server
(out) サブスクリプション管理リポジトリーを更新しています。
(out) メタデータの期限切れの最終確認: 0:01:28 前の 2023年11月09日 11時18分50秒 に実施しました。
(out) 依存関係が解決しました。
(out) =============================================================================================================================================================
(out)  パッケージ                             アーキテクチャー        バージョン                           リポジトリー                                      サイズ
(out) =============================================================================================================================================================
(out) インストール:
(out)  MariaDB-server                         x86_64                  10.11.5-1.el9                        mariadb                                            18 M
(out) 依存関係のインストール:
(out)  MariaDB-client                         x86_64                  10.11.5-1.el9                        mariadb                                           9.2 M
(out)  MariaDB-common                         x86_64                  10.11.5-1.el9                        mariadb                                            88 k
(out)  MariaDB-shared                         x86_64                  10.11.5-1.el9                        mariadb                                           130 k
(out)  boost-program-options                  x86_64                  1.75.0-8.el9                         rhel-9-for-x86_64-appstream-rpms                  108 k
(out)  daxctl-libs                            x86_64                  71.1-8.el9                           rhel-9-for-x86_64-baseos-rpms                      44 k
(out)  galera-4                               x86_64                  26.4.14-1.el9                        mariadb                                           1.3 M
(out)  libpmem                                x86_64                  1.12.1-1.el9                         rhel-9-for-x86_64-appstream-rpms                  115 k
(out)  libtirpc                               x86_64                  1.3.3-2.el9                          rhel-9-for-x86_64-baseos-rpms                      96 k
(out)  lsof                                   x86_64                  4.94.0-3.el9                         rhel-9-for-x86_64-baseos-rpms                     241 k
(out)  ndctl-libs                             x86_64                  71.1-8.el9                           rhel-9-for-x86_64-baseos-rpms                      91 k
(out)  perl-DBI                               x86_64                  1.643-9.el9                          rhel-9-for-x86_64-appstream-rpms                  729 k
(out)  perl-File-Copy                         noarch                  2.34-480.el9                         rhel-9-for-x86_64-appstream-rpms                   22 k
(out)  perl-Math-BigInt                       noarch                  1:1.9998.18-460.el9                  rhel-9-for-x86_64-appstream-rpms                  194 k
(out)  perl-Math-Complex                      noarch                  1.59-480.el9                         rhel-9-for-x86_64-appstream-rpms                   49 k
(out)  perl-Sys-Hostname                      x86_64                  1.23-480.el9                         rhel-9-for-x86_64-appstream-rpms                   20 k
(out)  rsync                                  x86_64                  3.2.3-19.el9                         rhel-9-for-x86_64-baseos-rpms                     402 k
(out)  socat                                  x86_64                  1.7.4.1-5.el9                        rhel-9-for-x86_64-appstream-rpms                  309 k
(out) 弱い依存関係のインストール:
(out)  pv                                     x86_64                  1.6.20-1.el9                         epel                                               65 k
(out)
(out) トランザクションの概要
(out) =============================================================================================================================================================
(out) インストール  19 パッケージ
(out)
(out) ダウンロードサイズの合計: 31 M
(out) インストール後のサイズ: 238 M
(out) これでよろしいですか? [y/N]: y
(out)
(out) …
(out)
(out) MariaDB                                                                                                                      215 kB/s |  15 kB     00:00
(out) GPG 鍵 0x1BB943DB をインポート中:
(out)  Userid     : "MariaDB Package Signing Key <package-signing-key@mariadb.org>"
(out)  Fingerprint: 1993 69E5 404B D5FC 7D2F E43B CBCB 082A 1BB9 43DB
(out)  From       : https://ftp.yz.yamagata-u.ac.jp/pub/dbms/mariadb/yum/RPM-GPG-KEY-MariaDB
(out) これでよろしいですか? [y/N]: y
(out) 鍵のインポートに成功しました
(out) GPG 鍵 0xC74CD1D8 をインポート中:
(out)  Userid     : "MariaDB Signing Key <signing-key@mariadb.org>"
(out)  Fingerprint: 177F 4010 FE56 CA33 3630 0305 F165 6F24 C74C D1D8
(out)  From       : https://ftp.yz.yamagata-u.ac.jp/pub/dbms/mariadb/yum/RPM-GPG-KEY-MariaDB
(out) これでよろしいですか? [y/N]: y
(out) 鍵のインポートに成功しました
(out)
(out) …
(out)
(out) Two all-privilege accounts were created.
(out) One is root@localhost, it has no password, but you need to
(out) be system 'root' user to connect. Use, for example, sudo mysql
(out) The second is mysql@localhost, it has no password either, but
(out) you need to be the system 'mysql' user to connect.
(out) After connecting you can set the password, if you would need to be
(out) able to connect as any of these users with a password and without sudo
(out)
(out) See the MariaDB Knowledgebase at https://mariadb.com/kb
(out)
(out) Please report any problems at https://mariadb.org/jira
(out)
(out) The latest information about MariaDB is available at https://mariadb.org/.
(out)
(out) Consider joining MariaDB's strong and vibrant community:
(out) https://mariadb.org/get-involved/
(out)
(out) …
(out)
(out) 完了しました!
MariaDB の設定ファイル編集
設定ファイルに文字コード(utf8mb4)を設定します。
[mysqld]
character-set-server = utf8mb4
[client]
default-character-set = utf8mb4CentOS 7(MariaDB 5.5.68)から移行した際、古い CGI プログラムが「DBD::mysql::st execute failed」というエラーで動かなくなった事がありました。
SQL_MODE のデフォルト値が厳密なモードに変更されたため、DB への INSERT が失敗するようになった事が原因です。
プログラムを修正するのが一番良いのですが、取り急ぎ SQL_MODE を以前と同じモード(指定なし)にすることで対処しました。
[mariadb]
sql_mode = ''
MariaDB 起動
systemctl start mariadbMariaDB 自動起動
systemctl enable mariadb
(out) Created symlink /etc/systemd/system/multi-user.target.wants/mariadb.service → /usr/lib/systemd/system/mariadb.service.
MariaDB 初期設定
mariadb-secure-installation を使って MariaDB の初期設定を行います。
後で phpMyAdmin をインストールするので、root パスワードを設定(変更)しています。
mariadb-secure-installation
(out)
(out) NOTE: RUNNING ALL PARTS OF THIS SCRIPT IS RECOMMENDED FOR ALL MariaDB
(out)       SERVERS IN PRODUCTION USE!  PLEASE READ EACH STEP CAREFULLY!
(out)
(out) In order to log into MariaDB to secure it, we'll need the current
(out) password for the root user. If you've just installed MariaDB, and
(out) haven't set the root password yet, you should just press enter here.
(out)
(out) Enter current password for root (enter for none):(空 ENTER)
(out) OK, successfully used password, moving on...
(out)
(out) Setting the root password or using the unix_socket ensures that nobody
(out) can log into the MariaDB root user without the proper authorisation.
(out)
(out) You already have your root account protected, so you can safely answer 'n'.
(out)
(out) Switch to unix_socket authentication [Y/n] n
(out)  ... skipping.
(out)
(out) You already have your root account protected, so you can safely answer 'n'.
(out)
(out) Change the root password? [Y/n] y
(out) New password:(root パスワード入力)
(out) Re-enter new password:(root パスワード再入力)
(out) Password updated successfully!
(out) Reloading privilege tables..
(out)  ... Success!
(out)
(out) By default, a MariaDB installation has an anonymous user, allowing anyone
(out) to log into MariaDB without having to have a user account created for
(out) them.  This is intended only for testing, and to make the installation
(out) go a bit smoother.  You should remove them before moving into a
(out) production environment.
(out)
(out) Remove anonymous users? [Y/n] y
(out)  ... Success!
(out)
(out) Normally, root should only be allowed to connect from 'localhost'.  This
(out) ensures that someone cannot guess at the root password from the network.
(out)
(out) Disallow root login remotely? [Y/n] y
(out)  ... Success!
(out)
(out) By default, MariaDB comes with a database named 'test' that anyone can
(out) access.  This is also intended only for testing, and should be removed
(out) before moving into a production environment.
(out)
(out) Remove test database and access to it? [Y/n] y
(out)  - Dropping test database...
(out)  ... Success!
(out)  - Removing privileges on test database...
(out)  ... Success!
(out)
(out) Reloading the privilege tables will ensure that all changes made so far
(out) will take effect immediately.
(out)
(out) Reload privilege tables now? [Y/n] y
(out)  ... Success!
(out)
(out) Cleaning up...
(out)
(out) All done!  If you've completed all of the above steps, your MariaDB
(out) installation should now be secure.
(out)
(out) Thanks for using MariaDB!
以上で MariaDB のインストールはできました。
phpMyAdmin の導入
続いて、運用上非常に便利な phpMyAdmin も導入していきます。
OpenLiteSpeed 公式に phpMyAdmin を導入するガイドがあったのですが、ざっくりしすぎていてあまり参考にはなりませんでした。

dnf install unzip
wget -q https://www.phpmyadmin.net/downloads/phpMyAdmin-latest-all-languages.zip
unzip phpMyAdmin-latest-all-languages.zip
mv phpMyAdmin-5.2.1-all-languages/ /usr/share/phpMyAdmin
rm -f phpMyAdmin-latest-all-languages.zip
mv /usr/share/phpMyAdmin/{config.sample.inc.php,config.inc.php}
OpenLiteSpeed の設定
OLS の管理画面から「バーチャルホスト」⇒「ホスト名」⇒「コンテキスト」と辿り、新しいコンテキストを追加します。
- タイプ:Static
- URI:/phpmyadmin
- 場所:/usr/share/phpMyAdmin
- インデクスファイル:index.php
IP アドレスによるアクセス制限をかける場合
- アクセスが許可されました:(アクセスを許可する IP アドレス)
- アクセスが拒否されました:*

固定 IP アドレスに対応したプロバイダーを契約している場合は IP アドレス制限を使えるので、安心して phpMyAdmin が設置できますね。
URI が phpmyadmin だと不正アクセスも多いので、違う URI を指定するのも良いと思います。
phpMyAdmin にログインする
https://ドメイン/phpmyadmin/ にアクセスすると、無事 phpMyAdmin のログイン画面が表示されました。
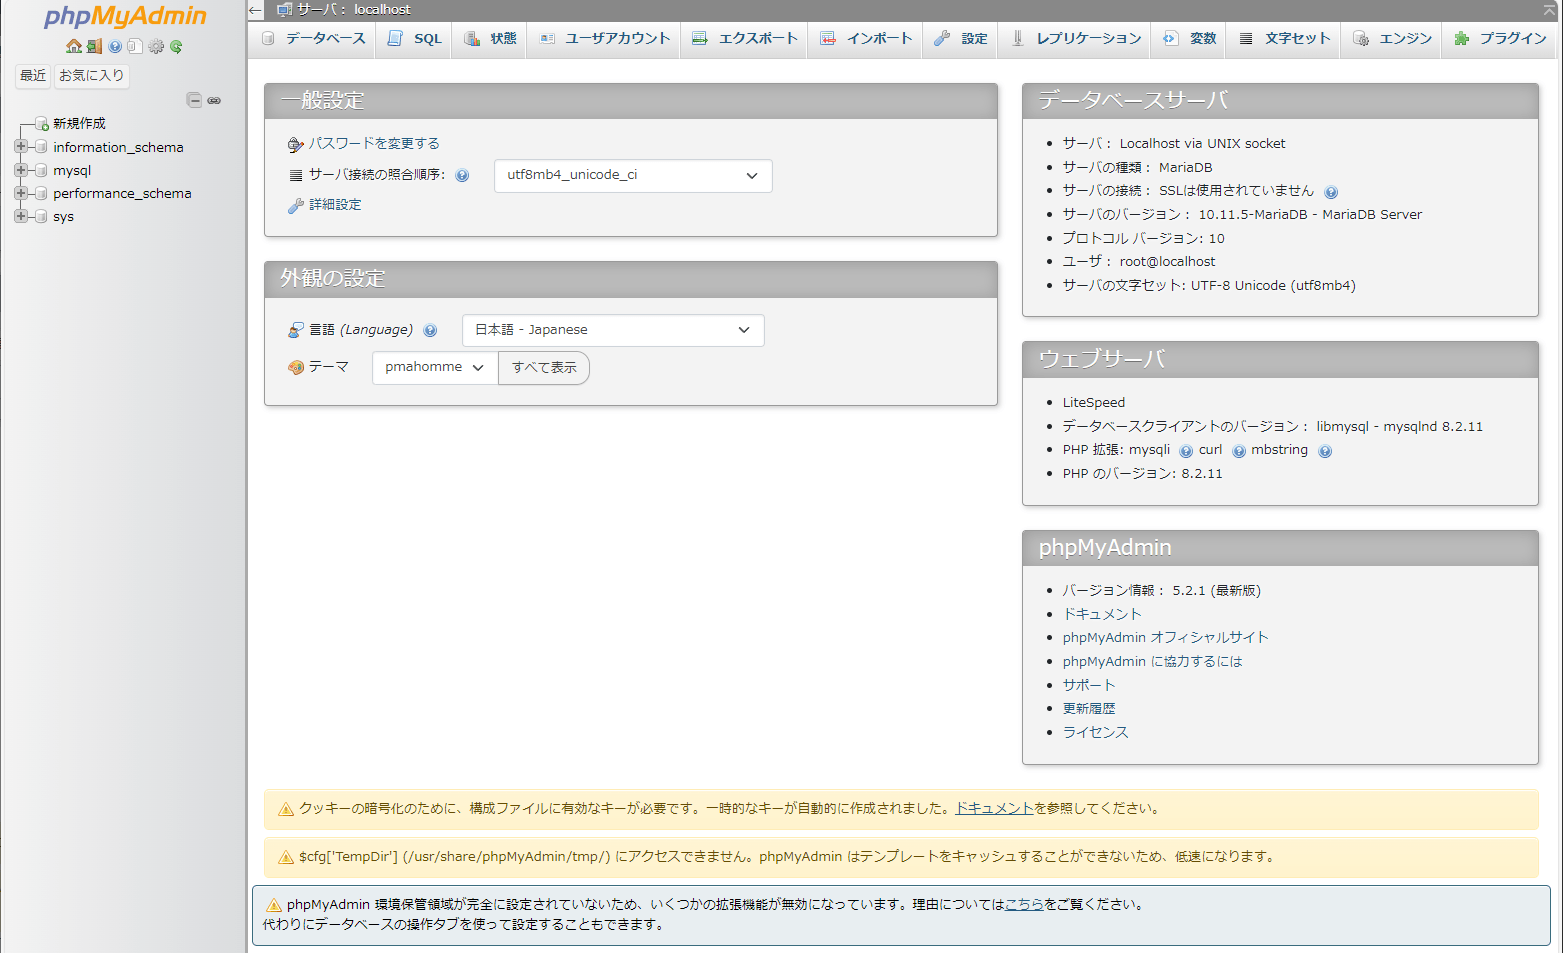
phpMyAdmin のエラーメッセージ対処
メインページの下部にエラーが表示されていますので、引き続き対処していきます。
blowfish_secret を設定する
まずは暗号化 (blowfish_secret) 用の非公開パスフレーズの設定をしていきます。
パスフレーズ生成のために expect パッケージをインストールします。
dnf install expect
(out) =============================================================================================================================================================
(out)  パッケージ                   アーキテクチャー             バージョン                           リポジトリー                                           サイズ
(out) =============================================================================================================================================================
(out) インストール:
(out)  expect                       x86_64                       5.45.4-15.el9                        rhel-9-for-x86_64-appstream-rpms                       255 k
(out) 依存関係のインストール:
(out)  tcl                          x86_64                       1:8.6.10-7.el9                       rhel-9-for-x86_64-baseos-rpms                          1.1 M
(out)
(out) トランザクションの概要
(out) =============================================================================================================================================================
(out) インストール  2 パッケージ
(out)
(out) ダウンロードサイズの合計: 1.3 M
(out) インストール後のサイズ: 4.7 M
(out) これでよろしいですか? [y/N]: y
(out)
mkpasswd-expect -l 32
(out) xxxxxxxxxxxxxxxxxxxxxxxxxxxxxxxx
「mkpasswd-expect -l 32」で 32 桁のランダムな文字列が生成されますので、それをコピーして config.inc.php に貼り付けます。
/**
 * This is needed for cookie based authentication to encrypt the cookie.
 * Needs to be a 32-bytes long string of random bytes. See FAQ 2.10.
 */
$cfg['blowfish_secret'] = '(ここに貼り付ける)'; /* YOU MUST FILL IN THIS FOR COOKIE AUTH! */
テンプレートのキャッシュを有効化
キャッシュに使用される tmp ディレクトリを作成し、phpMyAdmin 全体の所有者を OpenLiteSpeed のデフォルトである nobody にまとめて変更します。
mkdir /usr/share/phpMyAdmin/tmp
chown nobody:nobody -R /usr/share/phpMyAdmin
phpMyAdmin 環境保管領域の設定
エラーメッセージのリンク(https://ドメイン/phpmyadmin/index.php?route=/check-relations)にアクセスして、データベースを作成を押すと自動的に phpmyadmin データベースを作成してくれます。
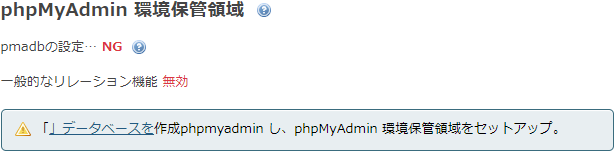
これで、エラーを潰すことができました。
php の関連パッケージをインストール
dnf で phpMyAdmin をインストールする際に、依存関係で導入される php の関連パッケージを調べてみます。(インストール自体はキャンセルします。)
dnf install phpmyadmin
(out) サブスクリプション管理リポジトリーを更新しています。
(out) 依存関係が解決しました。
(out) =============================================================================================================================================================
(out)  パッケージ                          アーキテクチャー        バージョン                              リポジトリー                                      サイズ
(out) =============================================================================================================================================================
(out) インストール:
(out)  phpMyAdmin                          noarch                  5.2.1-1.el9.remi                        remi                                              8.0 M
(out) 依存関係のインストール:
(out)  apr                                 x86_64                  1.7.0-11.el9                            rhel-9-for-x86_64-appstream-rpms                  127 k
(out)  apr-util                            x86_64                  1.6.1-23.el9                            rhel-9-for-x86_64-appstream-rpms                   97 k
(out)  apr-util-bdb                        x86_64                  1.6.1-23.el9                            rhel-9-for-x86_64-appstream-rpms                   14 k
(out)  gd                                  x86_64                  2.3.2-3.el9                             rhel-9-for-x86_64-appstream-rpms                  134 k
(out)  httpd                               x86_64                  2.4.57-5.el9                            rhel-9-for-x86_64-appstream-rpms                   52 k
(out)  httpd-core                          x86_64                  2.4.57-5.el9                            rhel-9-for-x86_64-appstream-rpms                  1.5 M
(out)  httpd-filesystem                    noarch                  2.4.57-5.el9                            rhel-9-for-x86_64-appstream-rpms                   16 k
(out)  httpd-tools                         x86_64                  2.4.57-5.el9                            rhel-9-for-x86_64-appstream-rpms                   87 k
(out)  libicu                              x86_64                  67.1-9.el9                              rhel-9-for-x86_64-baseos-rpms                     9.6 M
(out)  nginx-filesystem                    noarch                  1:1.20.1-14.el9_2.1                     rhel-9-for-x86_64-appstream-rpms                   11 k
(out)  php-common                          x86_64                  8.0.30-1.el9_2                          rhel-9-for-x86_64-appstream-rpms                  684 k
(out)  php-fpm                             x86_64                  8.0.30-1.el9_2                          rhel-9-for-x86_64-appstream-rpms                  1.6 M
(out)  php-gd                              x86_64                  8.0.30-1.el9_2                          rhel-9-for-x86_64-appstream-rpms                   41 k
(out)  php-intl                            x86_64                  8.0.30-1.el9_2                          rhel-9-for-x86_64-appstream-rpms                  150 k
(out)  php-mbstring                        x86_64                  8.0.30-1.el9_2                          rhel-9-for-x86_64-appstream-rpms                  470 k
(out)  php-mysqlnd                         x86_64                  8.0.30-1.el9_2                          rhel-9-for-x86_64-appstream-rpms                  152 k
(out)  php-pdo                             x86_64                  8.0.30-1.el9_2                          rhel-9-for-x86_64-appstream-rpms                   85 k
(out)  php-pecl-zip                        x86_64                  1.19.2-6.el9                            rhel-9-for-x86_64-appstream-rpms                   62 k
(out)  php-process                         x86_64                  8.0.30-1.el9_2                          rhel-9-for-x86_64-appstream-rpms                   45 k
(out)  php-xml                             x86_64                  8.0.30-1.el9_2                          rhel-9-for-x86_64-appstream-rpms                  138 k
(out)  redhat-logos-httpd                  noarch                  90.4-2.el9                              rhel-9-for-x86_64-appstream-rpms                   18 k
(out) 弱い依存関係のインストール:
(out)  apr-util-openssl                    x86_64                  1.6.1-23.el9                            rhel-9-for-x86_64-appstream-rpms                   17 k
(out)  mod_http2                           x86_64                  1.15.19-5.el9                           rhel-9-for-x86_64-appstream-rpms                  152 k
(out)  mod_lua                             x86_64                  2.4.57-5.el9                            rhel-9-for-x86_64-appstream-rpms                   62 k
(out)
(out) トランザクションの概要
(out) =============================================================================================================================================================
(out) インストール  25 パッケージ
(out)
(out) ダウンロードサイズの合計: 23 M
(out) インストール後のサイズ: 105 M
(out) これでよろしいですか? [y/N]: n
(out) 操作が中断されました。
OpenLiteSpeed のスクリプトハンドラ設定で PHP を lsphp82 で動かすように設定していますので、php- で始まるパッケージ名を lsphp82- に置き換えてインストールします。(php-fpm は除く)
また、lsphp82-pecl-zip は見つからなかったため、lsphp82-zip をインストールしておきました。
dnf install lsphp82-common lsphp82-gd lsphp82-mbstring lsphp82-mysqlnd lsphp82-pdo lsphp82-process lsphp82-xml lsphp82-zipこれで何かの拍子にモジュールが足りないせいでエラーになる可能性が減ると思います。
自動バックアップの設定
mariadb-dump を使って、自動的にデータベースのバックアップを取るようにします。
スクリプトは定番サイトをベースに設定しました。

mysqldump は mariadb-dump へのシンボリックリンクなので置き換え、エラー時に記録が残るように修正しました。
#!/bin/bash

PATH=/usr/local/sbin:/usr/bin:/bin

# バックアップ先ディレクトリ
BACKDIR=/backup/mariadb

# MariaDB rootパスワード
ROOTPASS=xxxxxxxx

# バックアップ先ディレクトリ再作成
rm  -rf $BACKDIR
mkdir -p $BACKDIR

# データベース名取得
DBLIST=`ls -p /var/lib/mysql | grep / | tr -d /`

# データベースごとにバックアップ
for dbname in $DBLIST
do
    [ $dbname = "performance_schema" ] && continue
    table_count=`mysql -u root -p$ROOTPASS -B -e "show tables" $dbname|wc -l`
    [ $table_count -ne 0 ] &&
    mariadb-dump --events -u root -p$ROOTPASS $dbname 2>&1 > $BACKDIR/$dbname.sql | logger -t mariadb-dump
done
MariaDB の root パスワードが記載されているので、root ユーザーしかアクセスできないようにパーミッションを変更します。
chmod 700 mariadb-backup.shCron に登録して、毎日自動的にバックアップされるように設定します。
echo "0 5 * * * root /root/mariadb-backup.sh" > /etc/cron.d/backupバックアップを Google Drive に同期する方法は別の記事にまとめました。
まとめ
データベースサーバーには内部からのアクセスのみを想定していますので、外部からアクセスする場合はファイアウォールで 3306 ポートを開放する必要があります。
設定方法については過去の記事を参考にしてください。
次回はこのサーバーに WordPress をインストールしていきます。

コメント