前回の記事で ConoHa の VPS に RHEL9 をインストールする手順を説明しましたが、今回はこれに基本的な設定を施していきます。
SELinux の無効化
当初の予定では SELinux を有効にしたまま運用する気だったのだが、いきなり SELinux 絡みでトラブルが発生して時間を費やす羽目になった。やはり無効にして運用する事にします。
まずは現状の SELinux の状態を確認すると、有効(Enforcing)になっている。
1 2 | # getenforce Enforcing |
SELinux を無効にして、システムを再起動する。
1 2 | # grubby --update-kernel ALL --args selinux=0 # reboot |
再起動後に無効(Disabled)になっていることを確認。
1 2 | # getenforce Disabled |
管理者の設定
ユーザーを wheel グループに追加
セットアップの際にユーザーを作成したが、そのとき「このユーザーを管理者にする」にチェックを入れておいたので、反映されているか確認する。
1 2 | # id ユーザー名 uid=1000(ユーザー名) gid=1000(ユーザー名) groups=1000(ユーザー名),10(wheel) |
wheel グループに追加されていることが確認できた。
wheel グループに追加されていない場合は、下記コマンドで追加する。
1 | # usermod -G wheel ユーザー名 |
su コマンドを実行できるユーザーを制限
/etc/pam.d/su の以下の行のコメントアウトを外す。
1 2 3 | #auth required pam_wheel.so use_uid ↓ auth required pam_wheel.so use_uid |
これで、root になれるユーザーが管理者のみになりました。
時刻合わせの設定
chrony で時刻合わせの設定をしていきます。
1 | # vi /etc/chrony.conf |
chrony の設定ファイルを開き、時刻同期先の NTP サーバーを国内のものに変更します。
1 2 3 | #pool 2.centos.pool.ntp.org iburst server ntp.nict.jp iburst pool ntp.jst.mfeed.ad.jp iburst |
時刻が大きくずれていると chrony が起動できないので、先に手動で時刻を合わせます。
1 2 | # chronyc makestep 200 OK |
chronyd の設定反映と、起動時に自動実行をさせます。
1 2 | # systemctl restart chronyd # systemctl enable chronyd |
しばらく経ってから同期の確認をしてみます。
1 2 3 4 5 6 7 | # chronyc sources MS Name/IP address Stratum Poll Reach LastRx Last sample =============================================================================== ^* ntp-b2.nict.go.jp 1 10 377 769 -30us[ -105us] +/- 735us ^- ntp2.jst.mfeed.ad.jp 2 9 377 257 -1257us[-1257us] +/- 51ms ^- ntp3.jst.mfeed.ad.jp 2 9 377 325 -395us[ -395us] +/- 80ms ^- ntp1.jst.mfeed.ad.jp 2 10 377 962 -687us[ -762us] +/- 62ms |
頭に「^* 」が付いているサーバーと同期中です。「^+ 」となっていれば同期対象候補で、「^- 」は同期対象から外れているサーバーです。
kdump の無効化
メモリを常時消費するため無効化する。
1 2 3 4 5 6 | # systemctl stop kdump.service # systemctl disable kdump.service Removed /etc/systemd/system/multi-user.target.wants/kdump.service. # sysctl -a | grep kernel.kptr_restrict kernel.kptr_restrict = 1 |
※ kernel.kptr_restrict の値が 1 であることを確認。
Syslog 用のローテーション設定
Syslog 用のログローテーション設定ファイルをインストールします。
1 | # dnf install rsyslog-logrotate |
パッケージを自動更新
CentOS 7 までは yum-cron を使って、パッケージを自動的に最新の状態に保っていました。RHEL 8 以降では dnf-automatic を使って行います。
まずは dnf-automatic のインストール。
1 | # dnf install dnf-automatic |
dnf-automatic の設定を変更していきます。
1 | # vi /etc/dnf/automatic.conf |
更新ファイルのチェックだけではなく、実際にアップデートを実行するようにします。
1 2 | #apply_updates = no apply_updates = yes |
定期実行を有効にして、毎日更新してもらうようにします。
1 2 | # systemctl enable dnf-automatic.timer Created symlink /etc/systemd/system/timers.target.wants/dnf-automatic.timer → /usr/lib/systemd/system/dnf-automatic.timer. |
念のため、何時に実行されるか確認しておきましょう。
1 | # systemctl edit --full dnf-automatic.timer |
1 2 3 4 5 6 7 8 9 10 11 12 13 | [Unit] Description=dnf-automatic timer # See comment in dnf-makecache.service ConditionPathExists=!/run/ostree-booted Wants=network-online.target [Timer] OnCalendar=*-*-* 6:00 RandomizedDelaySec=60m Persistent=true [Install] WantedBy=timers.target |
毎日 6:00 ~ 7:00 のランダムな時間に実行される様です。問題ないのでこのまま使用します。
automatic.conf の emit_via を stdio(デフォルト)から command_email に変更すると、更新内容をメールで通知するようになります。
メールサーバーの設定ができたら、必要に応じて変更すると良いでしょう。
FastestMirror の設定
遅いミラーリポジトリに接続するとインストールに時間がかかる場合があるので、FastestMirror を有効化する。
1 | # vi /etc/dnf/dnf.conf |
[main] ブロックの最後に fastestmirror=True を追加する。
1 2 3 4 5 6 7 | [main] gpgcheck=1 installonly_limit=3 clean_requirements_on_remove=True best=True skip_if_unavailable=False fastestmirror=True |
サードパーティーリポジトリの追加
EPEL リポジトリ
追加パッケージのインストールに必要な、EPEL(Extra Packages for Enterprise Linux)リポジトリを追加する。
1 2 3 | # subscription-manager repos --enable codeready-builder-for-rhel-9-$(arch)-rpms リポジトリー 'codeready-builder-for-rhel-9-x86_64-rpms' は、このシステムに対して有効になりました。 # dnf install https://dl.fedoraproject.org/pub/epel/epel-release-latest-9.noarch.rpm |

CRB(CodeReady Builder)リポジトリを有効にしてから、elep-release をインストールします。
1 2 | # dnf config-manager --set-enabled crb # dnf install epel-release epel-next-release |
Remi リポジトリ
PHP の最新バージョンなどが揃っている Remi リポジトリを追加します。RHEL9 の標準は PHP8.0 ですが、最新の PHP8.3 や、互換性重視の PHP7.4 を導入したい場合は必要になります。
1 2 | # dnf install https://rpms.remirepo.net/enterprise/remi-release-9.rpm # dnf config-manager --set-enabled remi |
利用可能なバージョンを確認します。
1 | # dnf module list php |
リセットしてから有効なバージョンを切り替えます。
1 2 | # dnf module reset php # dnf module install php:remi-8.3 |
必要なパッケージのインストール
Wget のインストール
ファイルをダウンロードするのに必要な wget をインストールします。
1 | # dnf install wget |
Git のインストール
同じく GitHub からファイルをダウンロードする際に必要な git をインストールします。
1 | # dnf install git |
bash-completion のインストール
各種コマンドで入力補完できるように bash-completion をインストールします。
1 | # dnf install bash-completion |
RHEL9 は base リポジトリからインストールできました。
一度ログアウトしてから、再度ログインすると Tab 補完が効くようになります。
SL のインストール
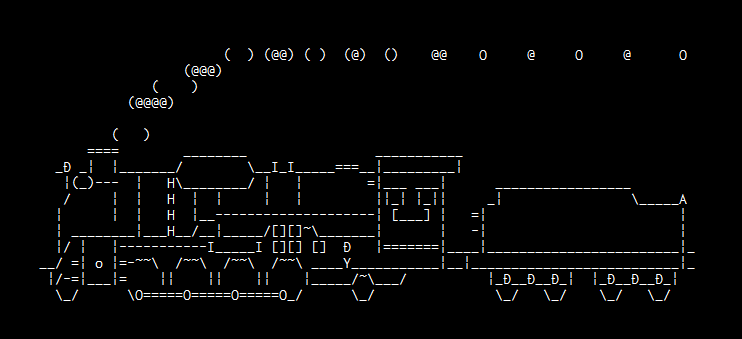
焦っているときに落ち着きを取り戻させてくれる SL コマンドをインストールします。
1 | # dnf install sl |
EPEL からインストールされますので、初めての場合は GPG 鍵のインポートを確認されます。
1 2 3 4 5 6 | GPG 鍵 0x3228467C をインポート中: Userid : "Fedora (epel9) <epel@fedoraproject.org>" Fingerprint: FF8A D134 4597 106E CE81 3B91 8A38 72BF 3228 467C From : /etc/pki/rpm-gpg/RPM-GPG-KEY-EPEL-9 これでよろしいですか? [y/N]: y 鍵のインポートに成功しました |
インストールできたら、試しにコマンドを実行してみます。
1 | # sl |

落ち着いたら、ファイアウォールの設定をしていきましょう。

コメント