
AlmaLinux 9 + OpenLiteSpeed 上に構築した Nextcloud をバージョン 32 にアップデートしたところ、Client Push がインストールされていないというエラーが出るようになりました。
Client Push is not installed, this might lead to performance issues when using desktop clients.
Client Push(Notify Push)は、デスクトップアプリにプッシュ更新のサポートをする HPB(High Performance Backend)です。
Client Push が導入されていない環境で、接続するデスクトップクライアントの数が多い場合、サーバーの負荷が大きくなる可能性があります。また、ファイルの変更には一定の遅延が発生してしまいます。
今回はこの Client Push を設定していきます。
環境
- OS: AlmaLinux release 9.6 (Sage Margay)
- ウェブサーバー: OpenLiteSpeed 1.8.4
- Nextcloud: Hub 10(31.0.10)⇒ Hub 25 Autumn(32.0.1)
- ドメイン直下ではなく、サブディレクトリ運用
- Docker コンテナの All-in-One ではなく、個別にセットアップ
- ホスティング: ConoHa VPS(メモリ 2GB)

Client Push のセットアップ
Client Push は、Nextcloud Office や Deck などのアプリをブラウザから使う際に、フォーカスが意図せず移動するなどの不具合があるようです。
これらのアプリを使う場合は、事前に Client Push を導入する必要があるか検討したほうが良いでしょう。
※私は Nextcloud Office を使っていないため未検証です。Deck についてはアプリをインストールして軽く触ってみましたが、特に問題は発生しませんでした。
Redis のインストール
Redis が必要になりますので、まだ導入されていない方は下記を参考にしてください。

Client Push アプリのインストール
Nextcloud に管理者でログインし、アプリ > ツール から Client Push をダウンロードして有効にします。
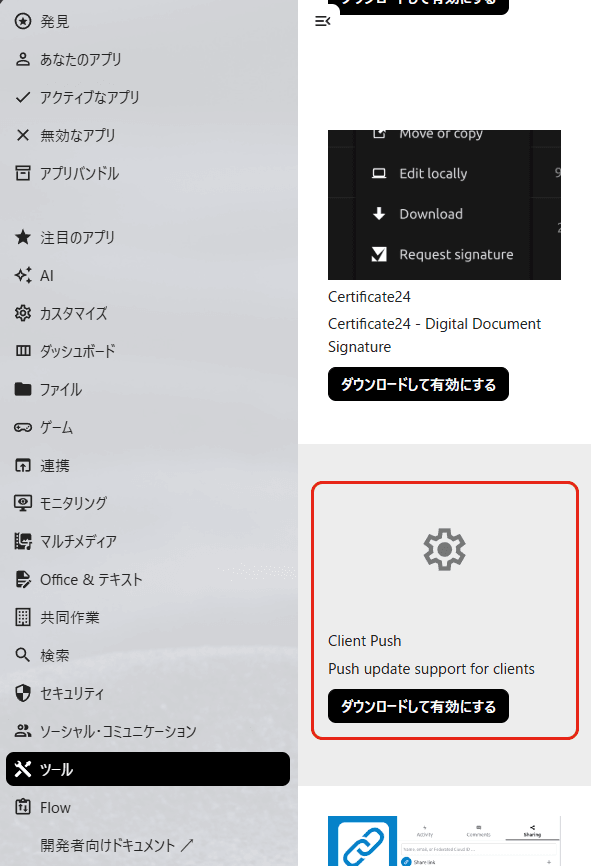
Client Push のバージョン 1.2.1 がインストールされました。
クイックセットアップ
OLS なので無理そうだと予想しつつクイックセットアップを試みましたが、案の定エラーになりました。
sudo -u nobody /usr/local/lsws/lsphp83/bin/php /usr/share/nextcloud/occ notify_push:setup
(out) This setup wizard is intended for use on single server instances
(out) where the nextcloud server, web server/reverse proxy and push daemon all run on the same machine.
(out) If your setup is more complex or involves any kind of load balancing
(out) you should follow the manual setup instruction on the README instead
(out) https://github.com/nextcloud/notify_push
(out) Press enter to continue or ESC to cancel...(エンター)
(out)
(out) Place the following systemd config at /etc/systemd/system/notify_push.service
(out)
(out) [Unit]
(out) Description = Push daemon for Nextcloud clients
(out)
(out) [Service]
(out) Environment=PORT=7867
(out) Environment=NEXTCLOUD_URL=https://example.com/nextcloud
(out) ExecStart=/usr/share/nextcloud/apps/notify_push/bin/x86_64/notify_push /usr/share/nextcloud/config/config.php
(out) Type=notify
(out) User=nobody
(out)
(out) [Install]
(out) WantedBy = multi-user.target
(out)
(out)
(out) And run sudo systemctl enable --now notify_push
(out) Press enter to continue or ESC to cancel...(エンター)
(out)
(out) 🗴 push binary doesn't seem to be running, did you follow the above instructions?.
(out)   See the steps in the README for manual setup instructions: https://github.com/nextcloud/notify_push
公式ページ を参考にマニュアルでセットアップしていきます。
systemd の作成
/etc/systemd/system/notify_push.service を作成します。
[Unit]
After = network.target mariadb.service lshttpd.service redis.service
Description = Push daemon for Nextcloud clients
Documentation = https://github.com/nextcloud/notify_push

[Service]
Environment = PORT=7867
ExecStart = /usr/share/nextcloud/apps/notify_push/bin/x86_64/notify_push /usr/share/nextcloud/config/config.php
Type = notify
User = nobody
Restart = always
RestartSec = 60

[Install]
WantedBy = multi-user.target
参考にしたページは Nginx 用の設定だったので、サービスとユーザーを OLS 用に修正して作成しました。
notify_push サービスを起動して、自動起動も設定しておきます。
systemctl start notify_push
systemctl enable --now notify_push
(out) Created symlink /etc/systemd/system/multi-user.target.wants/notify_push.service → /etc/systemd/system/notify_push.service.
OpenLiteSpeed の設定
予想以上に沼にハマったので、駄目だった方法も含めて共有します。
Web Socket Proxy を追加(NG)
OLS 管理画面にログインし、バーチャルホスト > (ドメイン名) > Web Socket Proxy と辿り、下記を追加しました。
- URI:/nextcloud/push
- アドレス:127.0.0.1:7867
occ notify_push:setup を実行したところ、HTTP でプッシュサーバーに到達できないようです。
sudo -u nobody /usr/local/lsws/lsphp83/bin/php /usr/share/nextcloud/occ notify_push:setup https://example.com/nextcloud/push
(out) ✓ redis is configured
(out) 🗴 can't connect to push server: Client error: `GET https://example.com/nextcloud/push/test/cookie` resulted in a `404 Not Found` response:
(out) <!DOCTYPE html>
(out) <html style="height:100%">
(out) <head>
(out) <meta name="viewport" content="width=device-width, initial-scale=1, sh (truncated...)
作成した Web Socket Proxy は削除して、別の方法を探ります。
Rewrite ルールにプッシュサーバーを指定(NG)
OLS 管理画面で、バーチャルホスト > (ドメイン名) > Rewrite の「Rewrite ルール」に下記の設定を追加しましたが、この方法でもうまくいきませんでした。(エラー内容は Web Socket Proxy の時と同じ)
RewriteRule ^/nextcloud/push/(.*) http://127.0.0.1:7867/$1 [P,L]外部アプリとしてプッシュサーバーを指定(一部 OK)
先に外部アプリとしてプッシュサーバーを登録し、その外部アプリの名前で設定したところ、HTTP の転送はできるようになりました。
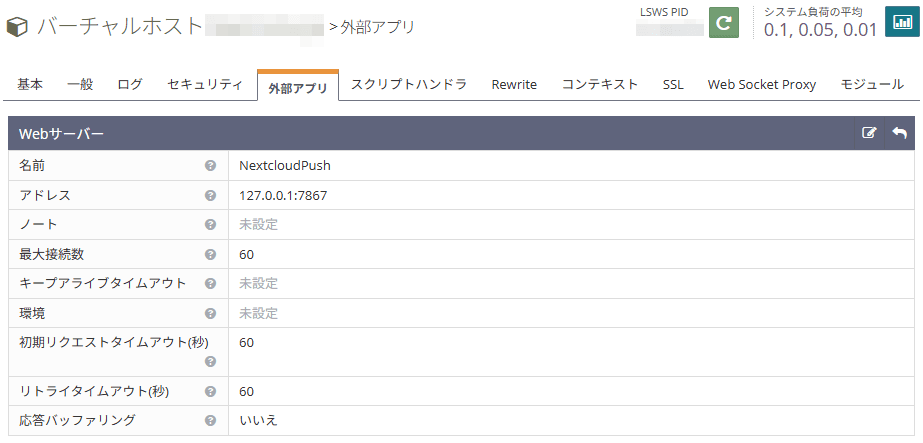
RewriteRule ^/nextcloud/push/(.*) http://NextcloudPush/$1 [P,L]occ notify_push:setup を実行しましたが、プッシュサーバーが Nextcloud の trusted proxy に設定されていないというエラーになりました。
sudo -u nobody /usr/local/lsws/lsphp83/bin/php /usr/share/nextcloud/occ notify_push:setup https://example.com/nextcloud/push
(out) ✓ redis is configured
(out) ✓ push server is receiving redis messages
(out) ✓ push server can load mount info from database
(out) ✓ push server can connect to the Nextcloud server
(out) 🗴 push server is not a trusted proxy by Nextcloud or another proxy in the chain.
(out)   Nextcloud resolved the following client address for the test request: "(グローバル IP アドレス)" instead of the expected "1.2.3.4" test value.
(out)   The following trusted proxies are currently configured: "127.0.0.1", "::1"
(out)   The following x-forwarded-for header was received by Nextcloud: "1.2.3.4"
(out)     from the following remote: (グローバル IP アドレス)
(out)
(out)   (グローバル IP アドレス) is not trusted as a reverse proxy by Nextcloud
(out)   See https://docs.nextcloud.com/server/latest/admin_manual/configuration_server/reverse_proxy_configuration.html#defining-trusted-proxies for how to add trusted proxies.
(out)
(out)   If you're having issues getting the trusted proxy setup working, you can try bypassing any existing reverse proxy
(out)   in your setup by setting the `NEXTCLOUD_URL` environment variable to point directly to the internal Nextcloud webserver url
(out)   (You will still need the ip address of the push server added as trusted proxy)
Nextcloud の設定ファイルを修正
エラーメッセージに従って Nextcloud の設定ファイル(/usr/share/nextcloud/config/config.php)の trusted_proxies に、サーバーのグローバル IP アドレスを追加。
'trusted_proxies' =>
  array (
    0 => '127.0.0.1',
    1 => '::1',
    2 => '(グローバル IP アドレス)',
  ),
再び occ notify_push:setup を実行すると、全てパスする事ができました。
sudo -u nobody /usr/local/lsws/lsphp83/bin/php /usr/share/nextcloud/occ notify_push:setup https://example.com/nextcloud/push
(out) ✓ redis is configured
(out) ✓ push server is receiving redis messages
(out) ✓ push server can load mount info from database
(out) ✓ push server can connect to the Nextcloud server
(out) ✓ push server is a trusted proxy
(out) ✓ push server is running the same version as the app
(out)   configuration saved
テストクライアントで確認
Client Push 用のテストクライアントが用意されていますので、Windows 用のクライアント(test_client-x86_64-pc-windows-gnu.exe)をダウンロードしました。
Windows 側でコマンドプロンプトを起動し、テストクライアントを実行したところ、今度は WebSocket が到達できずにエラーになりました。
test_client-x86_64-pc-windows-gnu.exe https://example.com/nextcloud <username> <password>
(out) INFO [test_client] test_client/src/main.rs:39: Found push server at wss://example.com/nextcloud/push/ws
(out) Error:   x Can't connect to server
(out)   |-> WebSocket protocol error: No "Connection: upgrade" header
(out)   `-> No "Connection: upgrade" header
Rewrite ルールの修正(OK)
公式サイトの Apache の設定例 のように、/push/ws(WebSocket)と /push(HTTP)を分けることで上手くいきました。
RewriteCond %{HTTP:Upgrade} =websocket [NC]
RewriteCond %{HTTP:Connection} =upgrade [NC]
RewriteRule ^/nextcloud/push/(ws.*)$ ws://127.0.0.1:7867/$1 [P,L]
RewriteRule ^/nextcloud/push/(.*) http://NextcloudPush/$1 [P,L]
HTTP には外部アプリ名で指定する必要があるのに、WebSocket ではループバックアドレスを指定する必要がある(外部アプリ名で指定すると NG)ので、その点に注意してください。
テストクライアントで確認
test_client-x86_64-pc-windows-gnu.exe https://example.com/nextcloud <username> <password>
(out) INFO [test_client] test_client/src/main.rs:39: Found push server at wss://example.com/nextcloud/push/ws
(out) INFO [test_client] test_client/src/main.rs:73: Authenticated
Authenticated となったので、無事に設定完了です。
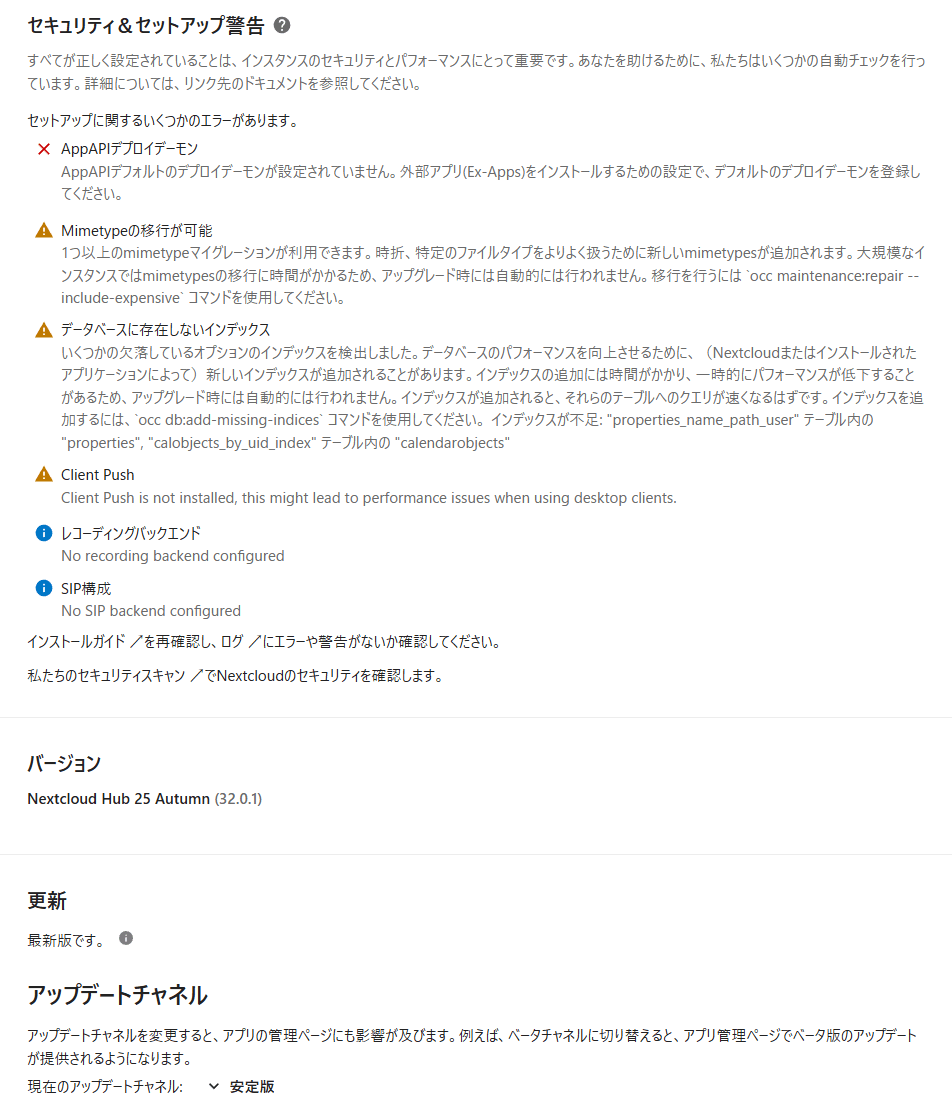
その他のセットアップ警告
Nextcloud Hub 25 Autumn (32.0.1) にアップデートした際に出た Client Push 以外のセットアップ警告についても対処しておきます。
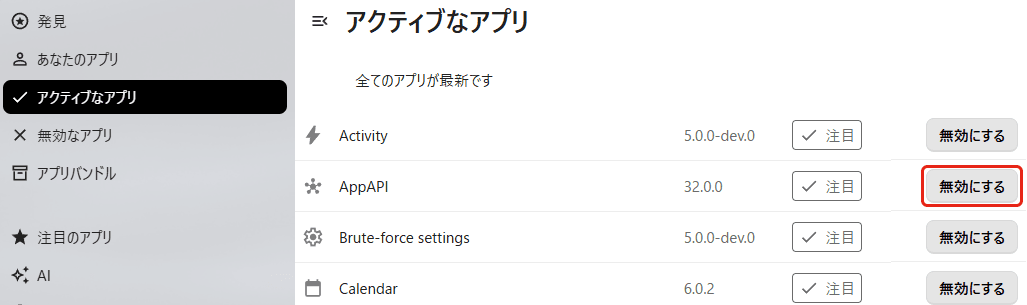
AppAPI デプロイデーモン
AppAPI デプロイデーモンについては利用する予定がないので、アクティブなアプリから「AppAPI」を無効にすることで解消しました。
Mimetype の移行が可能
警告文の通り、Mimetype のマイグレーションを行うことで解決します。
OpenLiteSpeed なので、nobody の権限で LSPHP を使ってコマンドを実行しました。
sudo -u nobody /usr/local/lsws/lsphp83/bin/php /usr/share/nextcloud/occ maintenance:repair --include-expensive「The current PHP memory limit is below the recommended value of 512MB.」と警告が出る場合は、下記の記事を参考にしてください。

データベースに存在しないインデックス
同様に、警告文に従って新しいインデックスを追加しました。
sudo -u nobody /usr/local/lsws/lsphp83/bin/php /usr/share/nextcloud/occ db:add-missing-indices
(out) Adding additional properties_name_path_user index to the oc_properties table, this can take some time...
(out) oc_properties table updated successfully.
(out) Adding additional calobjects_by_uid_index index to the oc_calendarobjects table, this can take some time...
(out) oc_calendarobjects table updated successfully.
以上で、Nextcloud Hub 25 Autumn (32.0.1) にアップデートした際のセットアップ警告を全て潰すことができました。


コメント